REVIT - MODERN HOUSE TUTORIAL (20 PARTS)
PART 1
PART 2
PART 3
PART 4
PART 5
PART 6
PART 7
PART 8
PART 9
PART 10
PART 11
PART 12
PART 13
PART 14
PART 15
PART 16
PART 17
PART 18
PART 19
PART 20
FINAL EXAMPLE
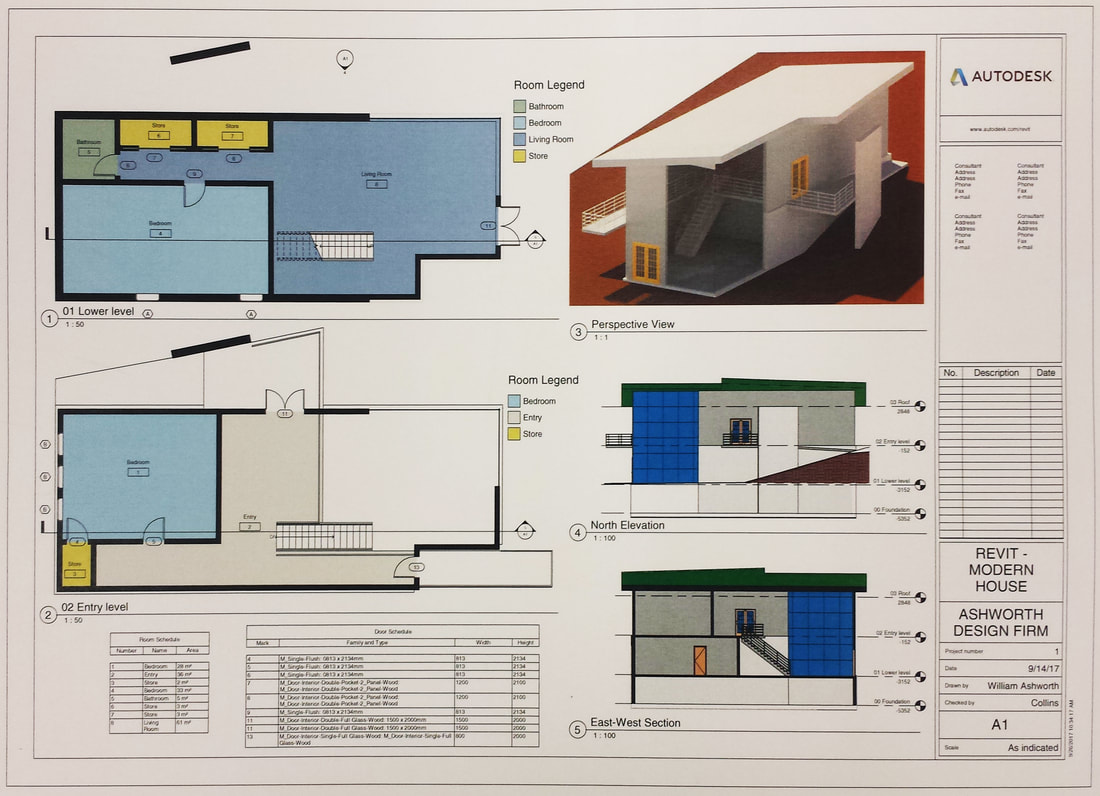
ARCHITECTURAL MODEL
When finished with this tutorial, your new assignment is to build an study model of the modern house.
To do this you will need to:
1. Transfer the linework of your Revit model into AutoCAD. To do this you just need to File > Export > CAD > dwg each view that you want to put in AutoCAD (2 Floor Plans, 1 Site Plan, 4 Elevations). You will need your visual style in Revit to be set to 'Hidden Lines' for it to export correctly. Also, remember that you can hide elements in each view if they are in the way of what you want to export. DO NOT export the 3D View to AutoCAD; it will not work correctly. Watch the following tutorial for a quick summary:
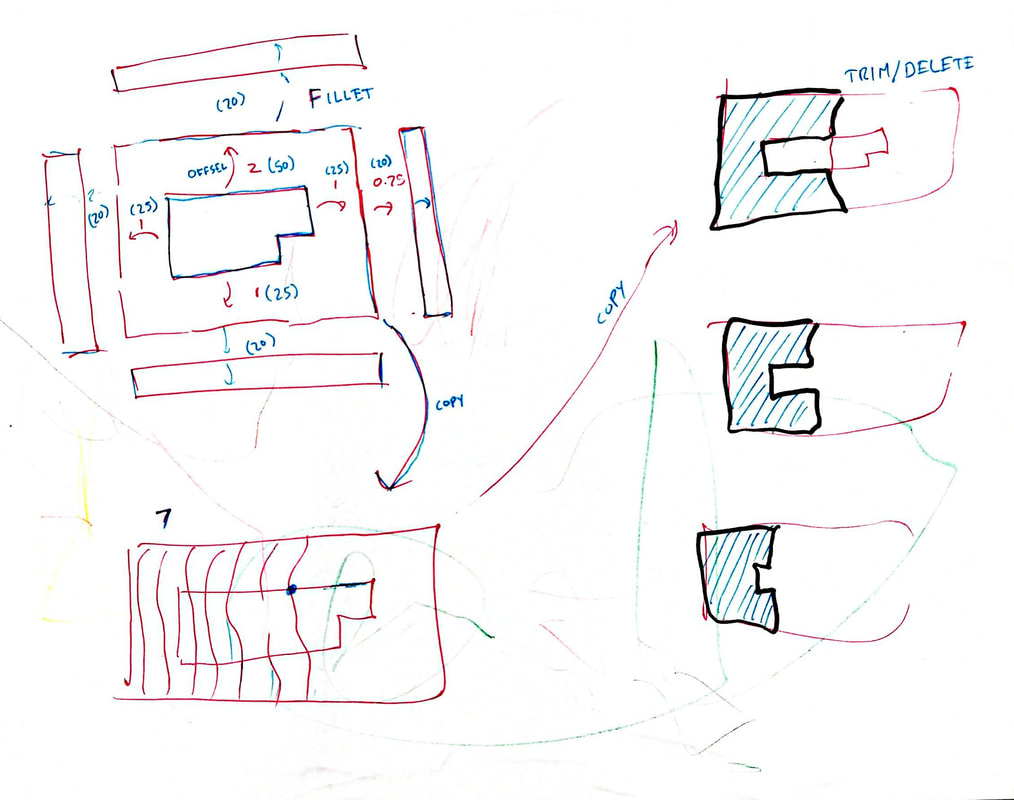
NOTE - you will need the following 31 pieces:
9 exterior walls (2 are glass)
1 roof
2 floors
9 interior walls
10 railings (2 stair rails)
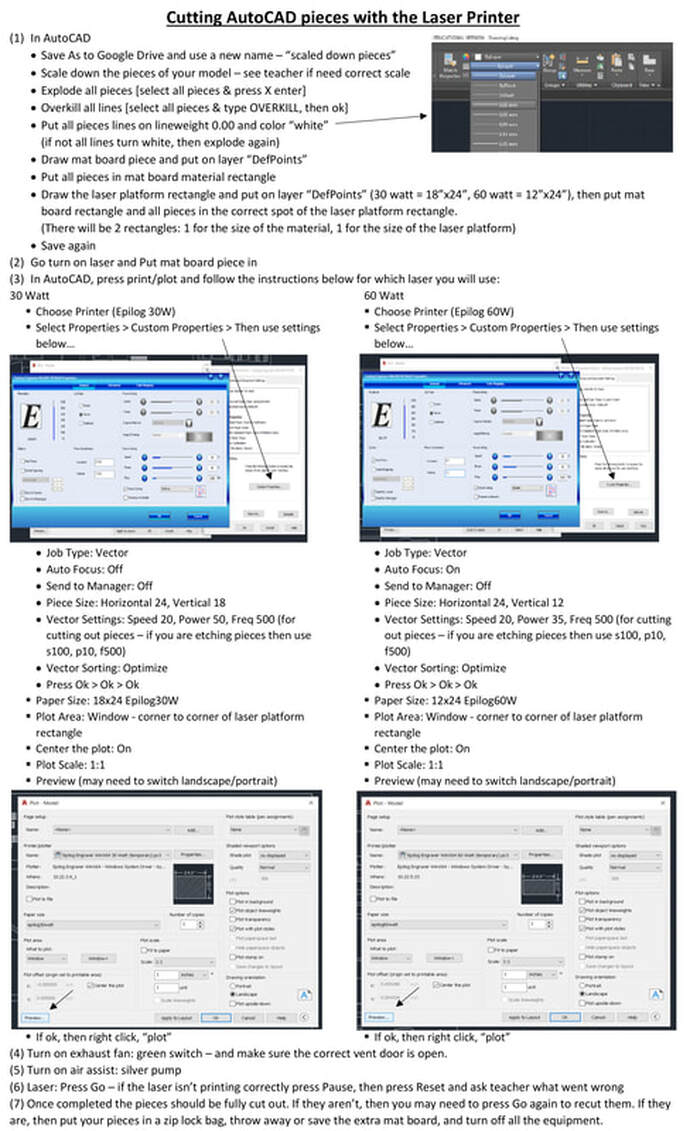
2. Clean up and scale your line work in AutoCAD, and print your pieces to one of the lasers. To do this you correctly, you will need to follow the checklist below:
TOPOGRAPHY MODEL
Follow this tutorial in order to produce the topography pieces:
Follow this tutorial in order to produce the topography pieces:
FINAL PORTFOLIO PAGE
Take pictures of your model and create a collage in Photoshop, showcasing your ability to make an architectural model. See example below:
Take pictures of your model and create a collage in Photoshop, showcasing your ability to make an architectural model. See example below:
